

The benefits of using a custom subdomain
- Significant increase in accuracy in browsers with strict privacy features such as Safari or Firefox.
- Ad blockers can’t block the JavaScript agent. Most ad blockers stop requests sent to an external URL, but allow requests sent to an internal URL like a subdomain.
- Cookies are recognized as “first-party.” This means they can be saved in the visitor’s browser and used to reliably identify visitors when third-party cookies are blocked completely (for example, Safari blocks all third-party cookies).
- Fingerprint becomes harder to detect. Requests made directly to the Fingerprint domain are easy to detect. Routing through a subdomain on your own domain makes Fingerprint harder for automated blockers and fraudsters to detect.
Limitations of the subdomain integration
- Since Safari 16.4, cookie lifetime in Safari is reduced to 7 days when using the custom subdomain setup. To keep cookies lasting up to one year in Safari, use a cloud proxy integration such as the Cloudflare proxy integration.
A note on DNS setupThis process requires adding DNS records to your domain, so make sure you have access to your DNS through your DNS provider. Here are guides for accessing DNS with some popular providers:If your DNS provider supports one-click setup, you can skip adding records by hand.
Set up in the dashboard
1. Register your custom subdomain
To use a custom subdomain, the connection between your site and Fingerprint must be secure, so Fingerprint registers every subdomain with an SSL certificate. Each workspace can have up to 50 unique subdomains. During your free trial, you can use up to 5. If you need more than 50, contact the support team. To start, go to Settings > Subdomains and select New subdomain.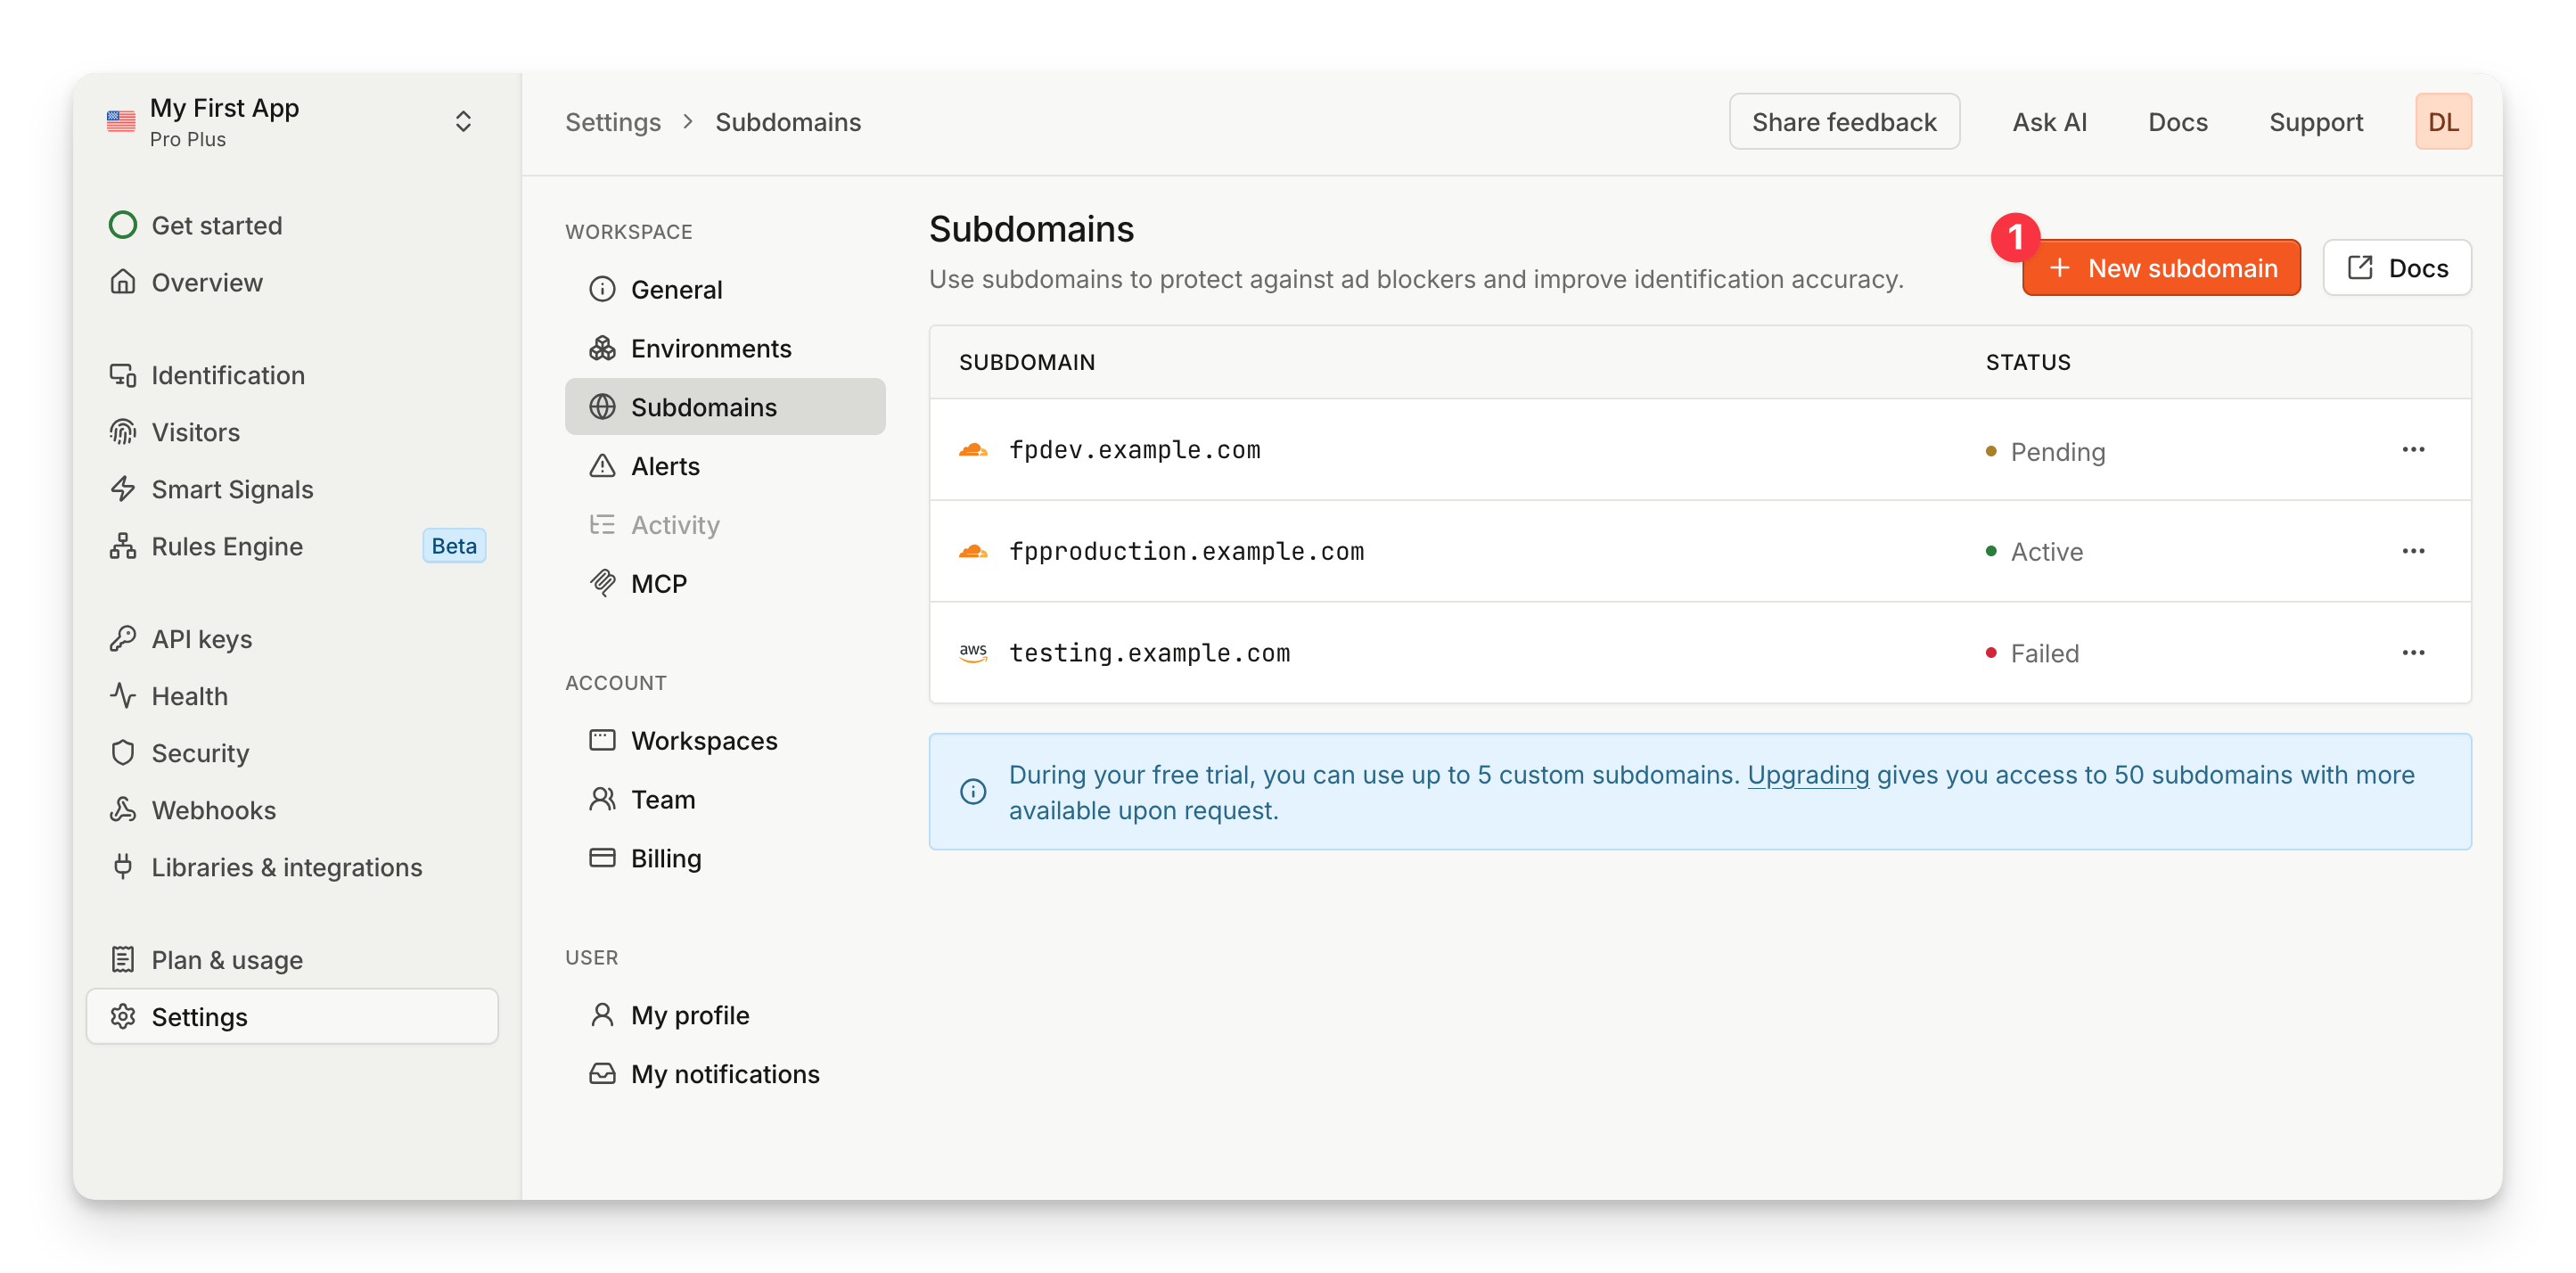
The Subdomains page in the Fingerprint dashboard
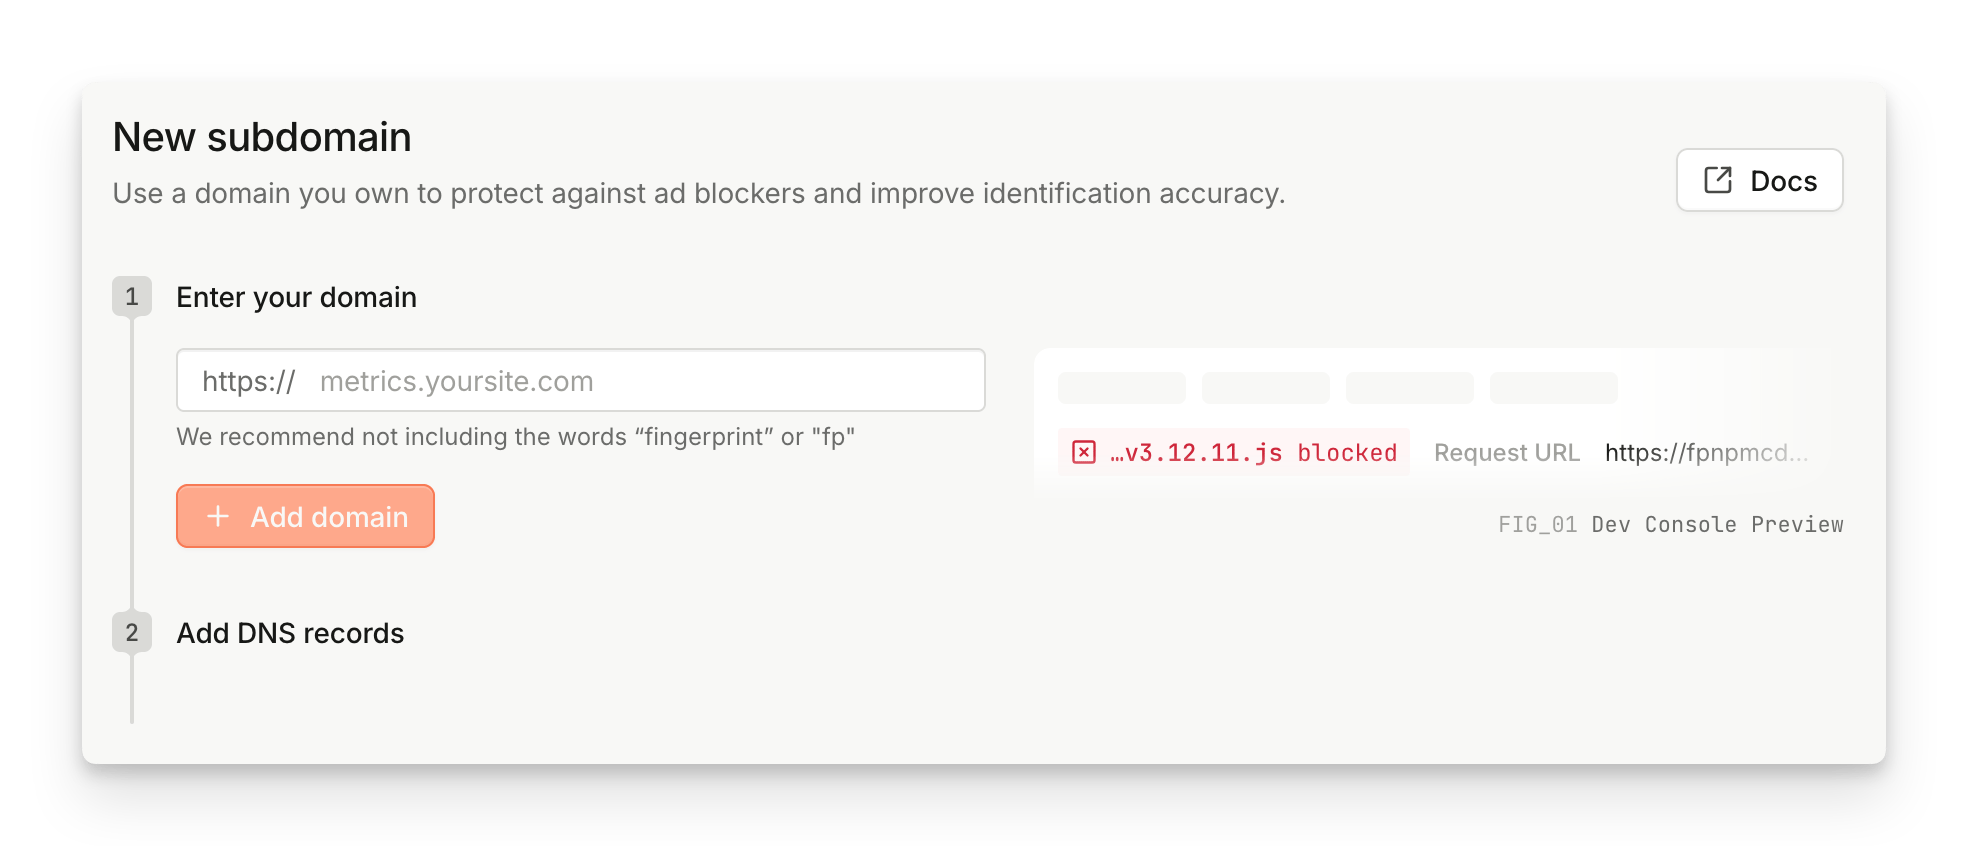
Adding a new subdomain in the Fingerprint dashboard
- Use the subdomain only for sending requests to Fingerprint.
- Match the subdomain’s primary domain to the request origin. For example, use
metrics.yourwebsite.comwhen you run Fingerprint onyourwebsite.com. - Avoid the words
fingerprintandfpin the subdomain name. Names likefingerprint.yourwebsite.comorfp.yourwebsite.comare easier for ad blockers to detect and block. Use a neutral name likemetrics.yourwebsite.cominstead.
2. Add DNS records
Your subdomain needs three DNS records:- One CNAME record verifies that you own the domain.
- Two A records route identification traffic to Fingerprint.
One-click setup with Domain Connect
Domain Connect is an open standard that lets Fingerprint apply DNS records to your domain once you authorize it with your DNS provider. If your DNS provider supports one-click setup, use it instead of adding the records yourself. These DNS providers support one-click setup with Fingerprint:- Cloudflare
- Select Connect. The dashboard redirects you to your DNS provider.
- Sign in to your DNS provider if you aren’t signed in already.
- Review the consent page. It lists the exact CNAME and A records Fingerprint adds. With Cloudflare, the records are shown as DNS only, make sure that proxying stays off.
- Select Authorize. Your DNS provider adds the records right away and returns you to the dashboard.
Authorizing through Domain Connect is a one-time action for a single subdomain. It doesn’t give Fingerprint ongoing access to your DNS or the ability to make later changes. To set up another subdomain, run the flow again.
Add DNS records manually
If your DNS provider doesn’t support Domain Connect, or you prefer to add the records yourself, the dashboard shows every record you need in one place. To add every record at once, select Copy all records and paste them into your DNS provider. This uses the standard zone file format, which providers like Cloudflare and Route 53 accept for bulk import. You can also copy each record individually.You can add the two A records right away. They start routing traffic once your certificate is issued.
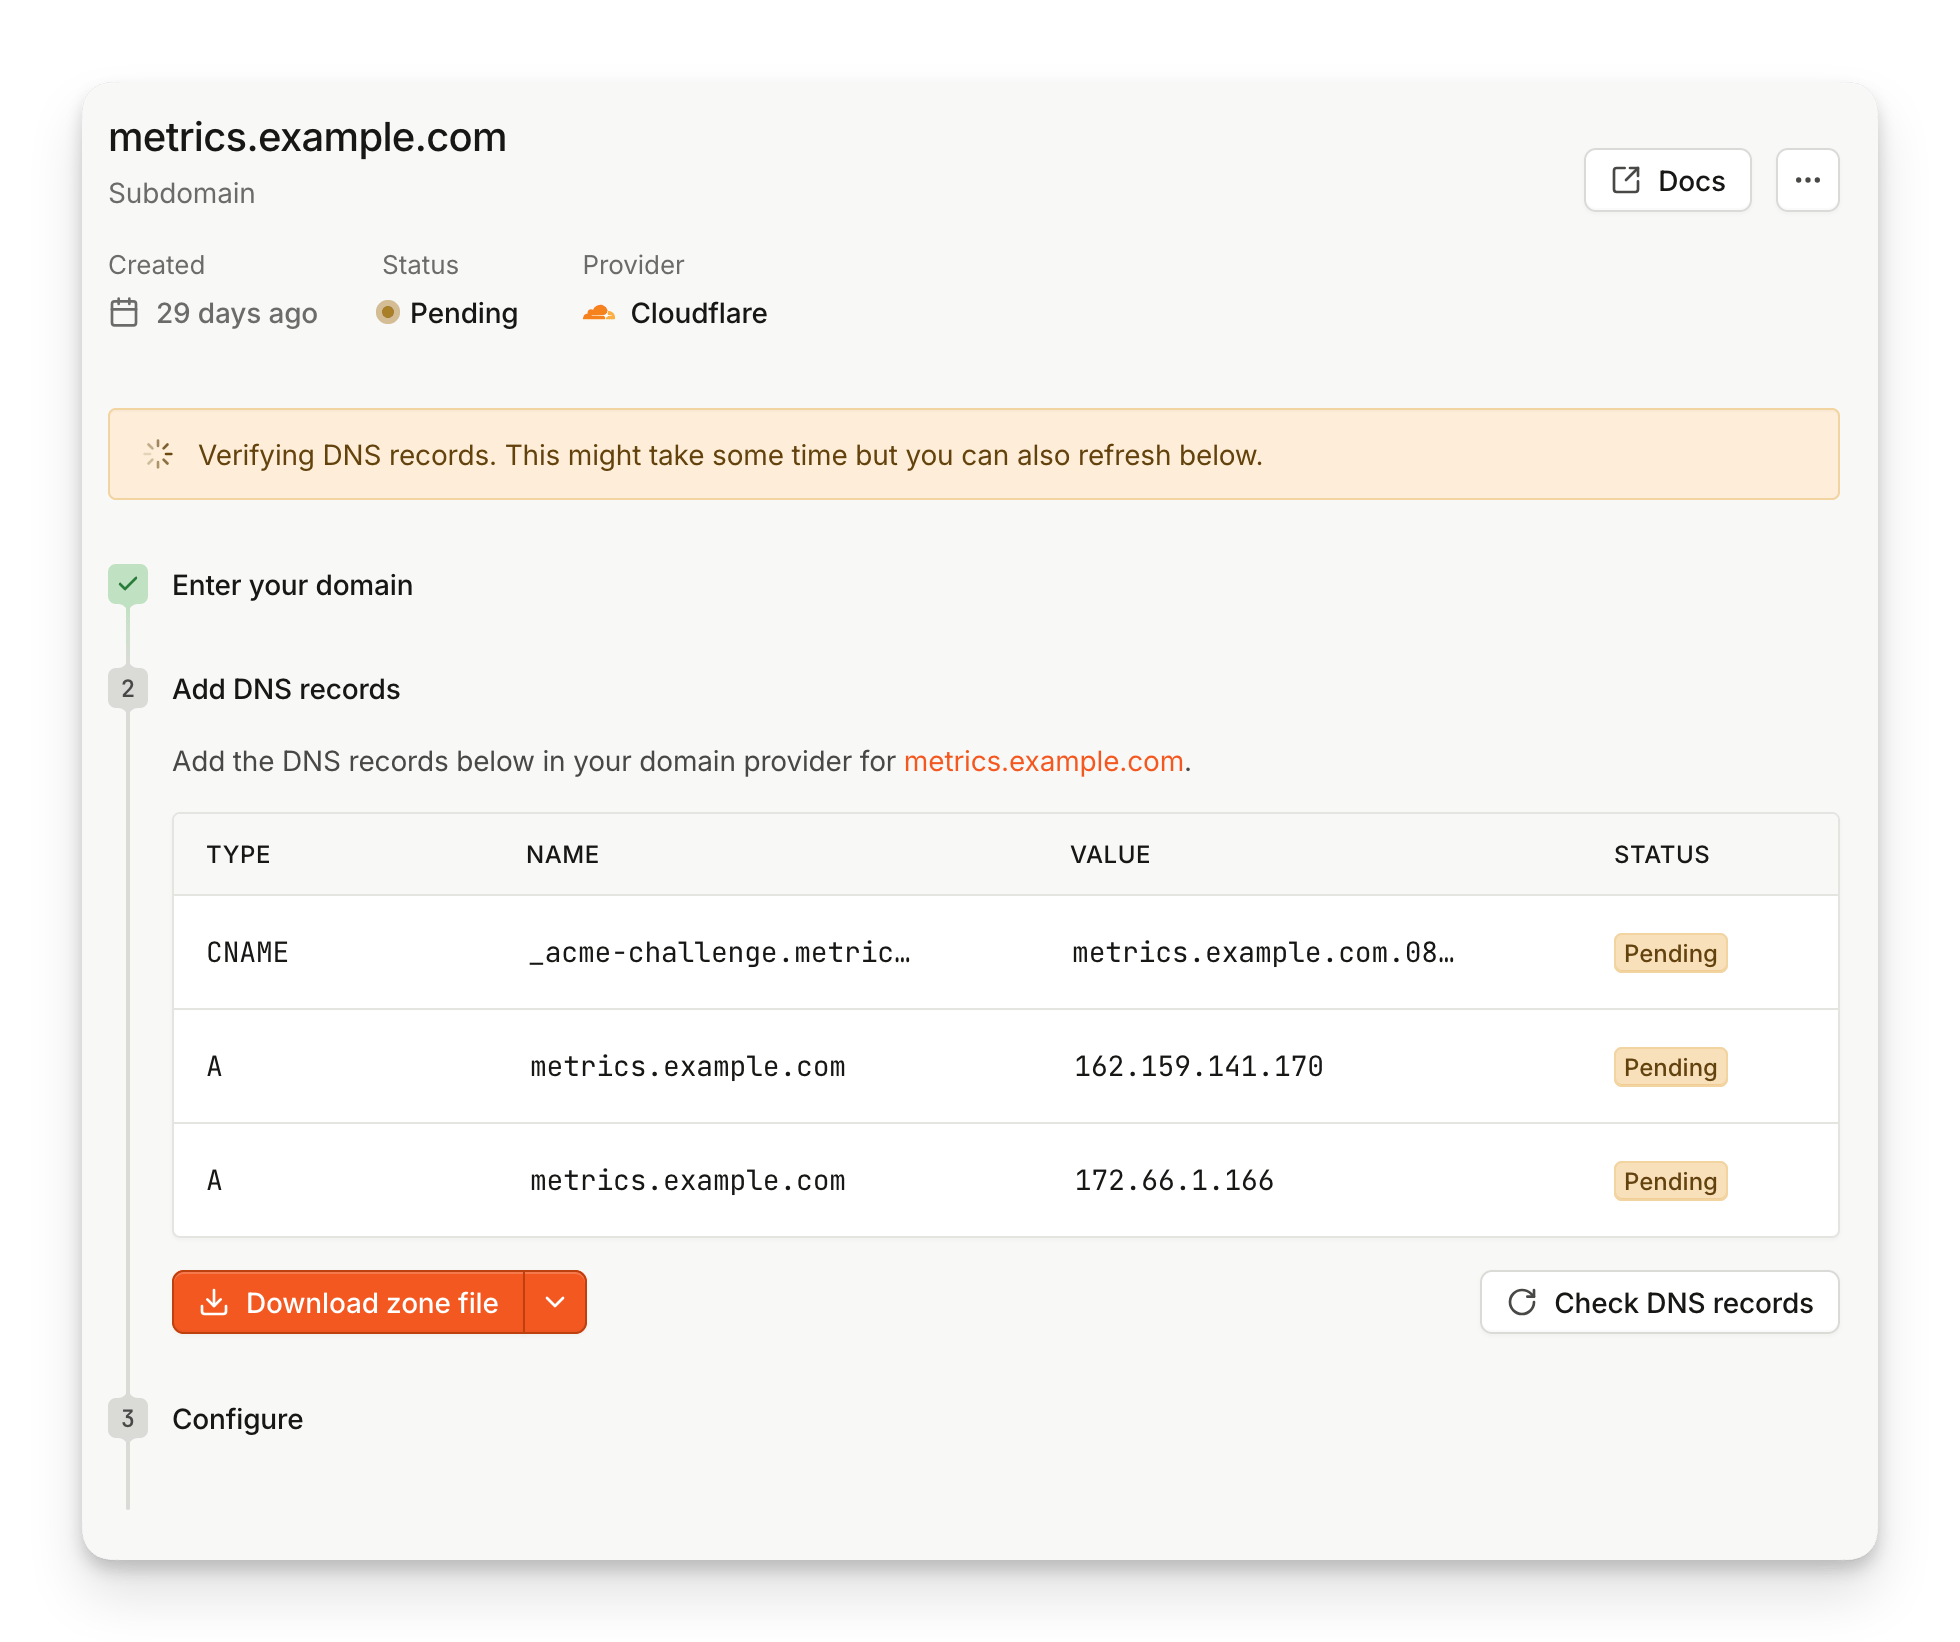
Showing the DNS records that need to be set
Conflicting CAA records
Fingerprint also checks your domain for a conflicting CAA record. A CAA record controls which certificate authorities can issue certificates for your domain, and a conflicting one prevents Fingerprint’s SSL provider (Cloudflare) from issuing yours. If Fingerprint finds a conflict, the dashboard shows an extra CAA record to add alongside the others, for example:Verify your records
Once the records are in place, whether you added them through one-click setup or by hand, Fingerprint checks for them automatically and updates the status on the Subdomains page. To run a check right away, click Check DNS records. Fingerprint also emails you once your certificate is issued. DNS changes can take up to 24 hours to propagate. If Fingerprint doesn’t detect your records yet, wait a while and click Check DNS records again. If your records aren’t validated within 14 days, the subdomain times out. Add your DNS records and restart verification to try again.Subdomain statuses
Each subdomain shows one of these statuses:- Pending: Fingerprint is validating your DNS records and issuing the SSL certificate. This can take up to 24 hours. To confirm a record was added correctly, run
dig HOST +shortin your terminal, using the host value of the record. If the record is set up correctly, its value is returned. - Active: Your records are validated and the certificate is issued. Your subdomain is ready to use.
- Timed out: DNS validation timed out because the required records weren’t added in time. Add the DNS records, then restart verification.
- Failed: The records were found, but the certificate can’t be issued. This usually happens when a conflicting CAA record blocks Fingerprint’s SSL provider (Cloudflare) from issuing certificates. Add the CAA record shown in the dashboard, wait for it to propagate, then delete the failed subdomain and add it again.
Using Cloudflare as your DNS provider?
- Disable DNS proxying for all records associated with your subdomain. One-click setup does this for you by adding the records in DNS only mode.
- Cloudflare sometimes adds CAA records that aren’t visible in the DNS panel. To see them, run
dig caa yourwebsite.com, replacingyourwebsite.comwith your domain. - Cloudflare’s CNAME flattening can prevent CNAME validation from working. Disable it if you have validation issues with Cloudflare DNS.
3. Configure the JavaScript agent
Once your subdomain is active, update the JavaScript agentendpoints property to point to your subdomain.
Notes:
- The endpoint subdomain should match the domain of your website.
- If you use a Content Security Policy on your website, add the custom subdomain to the
connect-srcdirective of your policy. See the CSP guide for more details. - If you issued a wildcard SSL certificate, the URL shows an asterisk, for example
*.yourwebsite.com. Replace the asterisk with the subdomain you plan to use, for examplemetrics.yourwebsite.com.
Set up with the CLI
From your application repository, run:Manage subdomains with the Management API
Instead of the dashboard, you can manage the full subdomain lifecycle programmatically with the Management API. This is useful when you automate your workspace setup, provision a subdomain per customer, or manage subdomains from a CI/CD pipeline. A subdomain works the same way whether you create it in the dashboard or through the API, and subdomains appear in both places regardless of how you created them. For one-click DNS setup from a local tool such as the Fingerprint CLI, request a Domain Connect URL with the port of a local callback listener, then open the returned URL in your browser. Authorization happens at your DNS provider. The callback listener must be reachable from your browser. If Domain Connect isn’t available, add the returned DNS records manually. The CLI handles the local callback listener and opens the authorization link for you. For unattended server or CI/CD workflows, configure the DNS records through your DNS provider’s API instead. To use these endpoints, you need a Management API key. All requests use the base URLhttps://management-api.fpjs.io and follow the standard Management API authentication and versioning conventions.
Available endpoints
- Register a subdomain (
POST /subdomains): Registers the subdomain and returns every DNS record you need, the verificationCNAMEand the routingArecords, in a single response. - List subdomains (
GET /subdomains): Lists every subdomain in the workspace and its status. Filter bystatusto find, for example, subdomains still in thependingstate. - Get subdomain (
GET /subdomains/{id}): Retrieves a single subdomain with its DNS records and current status. - Create Domain Connect URL (
POST /subdomains/{id}/domain-connect): Returns a signed DNS-provider authorization link that redirects to your local callback listener. - Verify subdomain (
POST /subdomains/{id}/verify): Triggers an on-demand DNS check instead of waiting for the next background check. Use this right after you add your DNS records. - Delete subdomain (
DELETE /subdomains/{id}): Deletes the subdomain and revokes its SSL certificate.
Typical flow
1
Register the subdomain
Send a
POST /subdomains request with your subdomain, then read the DNS records from the response. All records, the verification CNAME and both routing A records, are returned at once, so you can add them in a single pass.2
Add the DNS records
Add the returned records to your DNS provider, or use a Domain Connect URL to authorize one-click setup when supported. You can add the
A records right away; they start routing traffic once your certificate is issued. Browser authorization doesn’t mean the subdomain is active yet.3
Wait for the subdomain to become active
Fingerprint validates your records automatically. To check immediately, call
POST /subdomains/{id}/verify. Poll GET /subdomains/{id} until the status is active, or pass a webhook_url when you register the subdomain to receive a signed callback on every status change instead of polling.4
Configure the JavaScript agent
Once the subdomain is
active, configure the JavaScript agent to point at it.pending, active, timed_out, and failed. A timed_out or failed subdomain is safe to delete and recreate.
The same limits apply as in the dashboard: each workspace can have up to 50 subdomains, or 5 during a free trial.
Frequently asked questions
My DNS provider doesn’t offer one-click setup. What should I do?
Add the DNS records manually. The dashboard shows all of them at once, and the setup works the same way. See the supported providers for the current list.I completed the setup. How can I add more subdomains?
To add more subdomains, add them individually at any time:- Go to Settings > Subdomains and select New subdomain.
- Repeat the setup steps for each new subdomain.