Availability
- JavaScript agent version 4.0.0+
How Sealed Client Results work
Sealed Client Results is an alternative delivery mechanism for information normally available only through our Server API. Usually, you would need to call the Server API on your backend to:- Validate the authenticity of the visitor ID and other information sent from the client.
- Get the full identification event, including Smart Signals.
/v4/events Server API endpoint. This has two main advantages:
- Reduced end-to-end latency — unsealing the result happens on your server, no need to call the Server API.
- Increased secrecy — the payload is fully encrypted with a symmetric key, making it impossible for a malicious actor to read or modify the results on the client, similar to Zero Trust Mode.
Data flow

Configuring Sealed Client Results
If you want to use Sealed Client Results, complete the following steps (the order is important):- Find an Encryption key for your environment in the Dashboard.
- Set up your backend to accept Sealed Results and decrypt them with that key.
- Prepare your frontend to start sending the encrypted payload to the backend.
- Activate the Encryption key in the Dashboard to start receiving Sealed Client Results in the JavaScript agent response.
Step 1: Find an encryption key in the Dashboard
Navigate to Dashboard > API Keys > Sealed Client Results.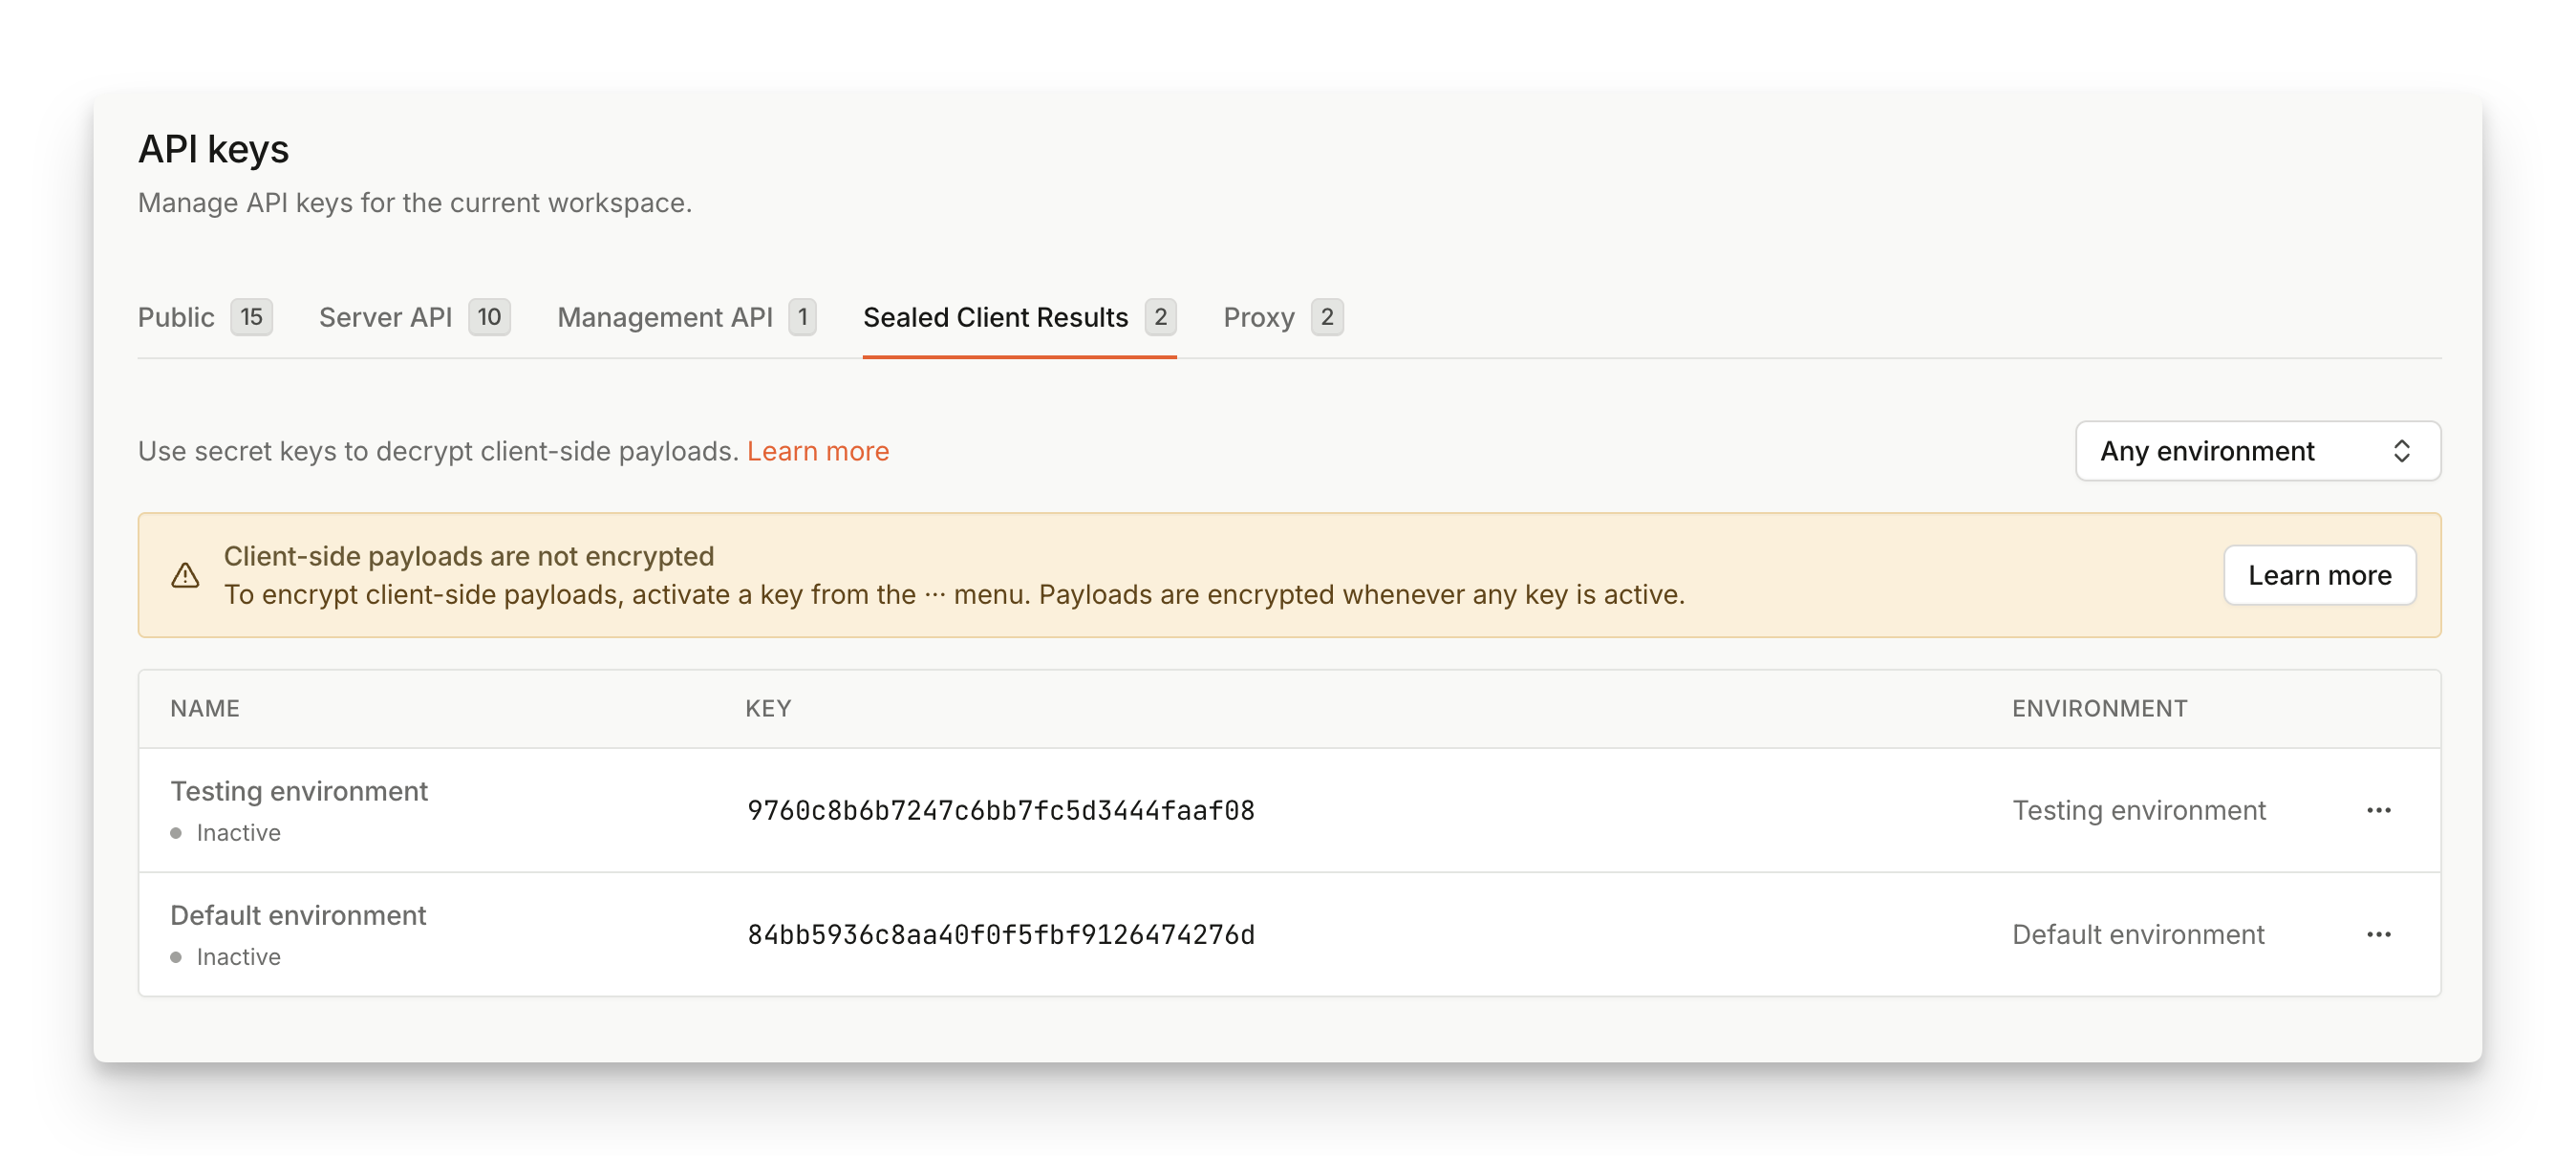
Step 2: Decrypt and validate the sealed_result payload on your backend
Once the payload arrives at your backend, it needs to be decrypted using the Encryption key found in the previous step.
In JavaScript agent v4, sealed_result is returned as BinaryOutput, not as a string. Before sending it to your server, serialize it with one of the BinaryOutput methods:
base64()byteArray()blob()toString()toJSON()
base64(). The base64 payload has a format covered in Appendix: Payload format.
The easiest way to decrypt the sealed result is to use one of our Server SDKs.
Step 3: Send sealed_result to your backend
Adjust your client code to serialize and send the sealed_result received from the Fingerprint JavaScript agent to the server endpoint you prepared in the previous step:
Server API FallbackYou may also consider sending the
event_id that is returned in the regular JavaScript agent response to support the fallback to Server API request if something goes wrong and sealed_result is not available.Step 4: Activate the encryption key in the Dashboard
Once the backend is set up to accept and decrypt incoming traffic, and the frontend contains code to send thesealed_result to the backend, you can activate your Encryption key.
- Navigate to Dashboard > API Keys > Sealed Client Results.
- Find the key you want to activate, click
...and select Activate. - Once active, all events from the associated environment will be sealed using the encryption key.
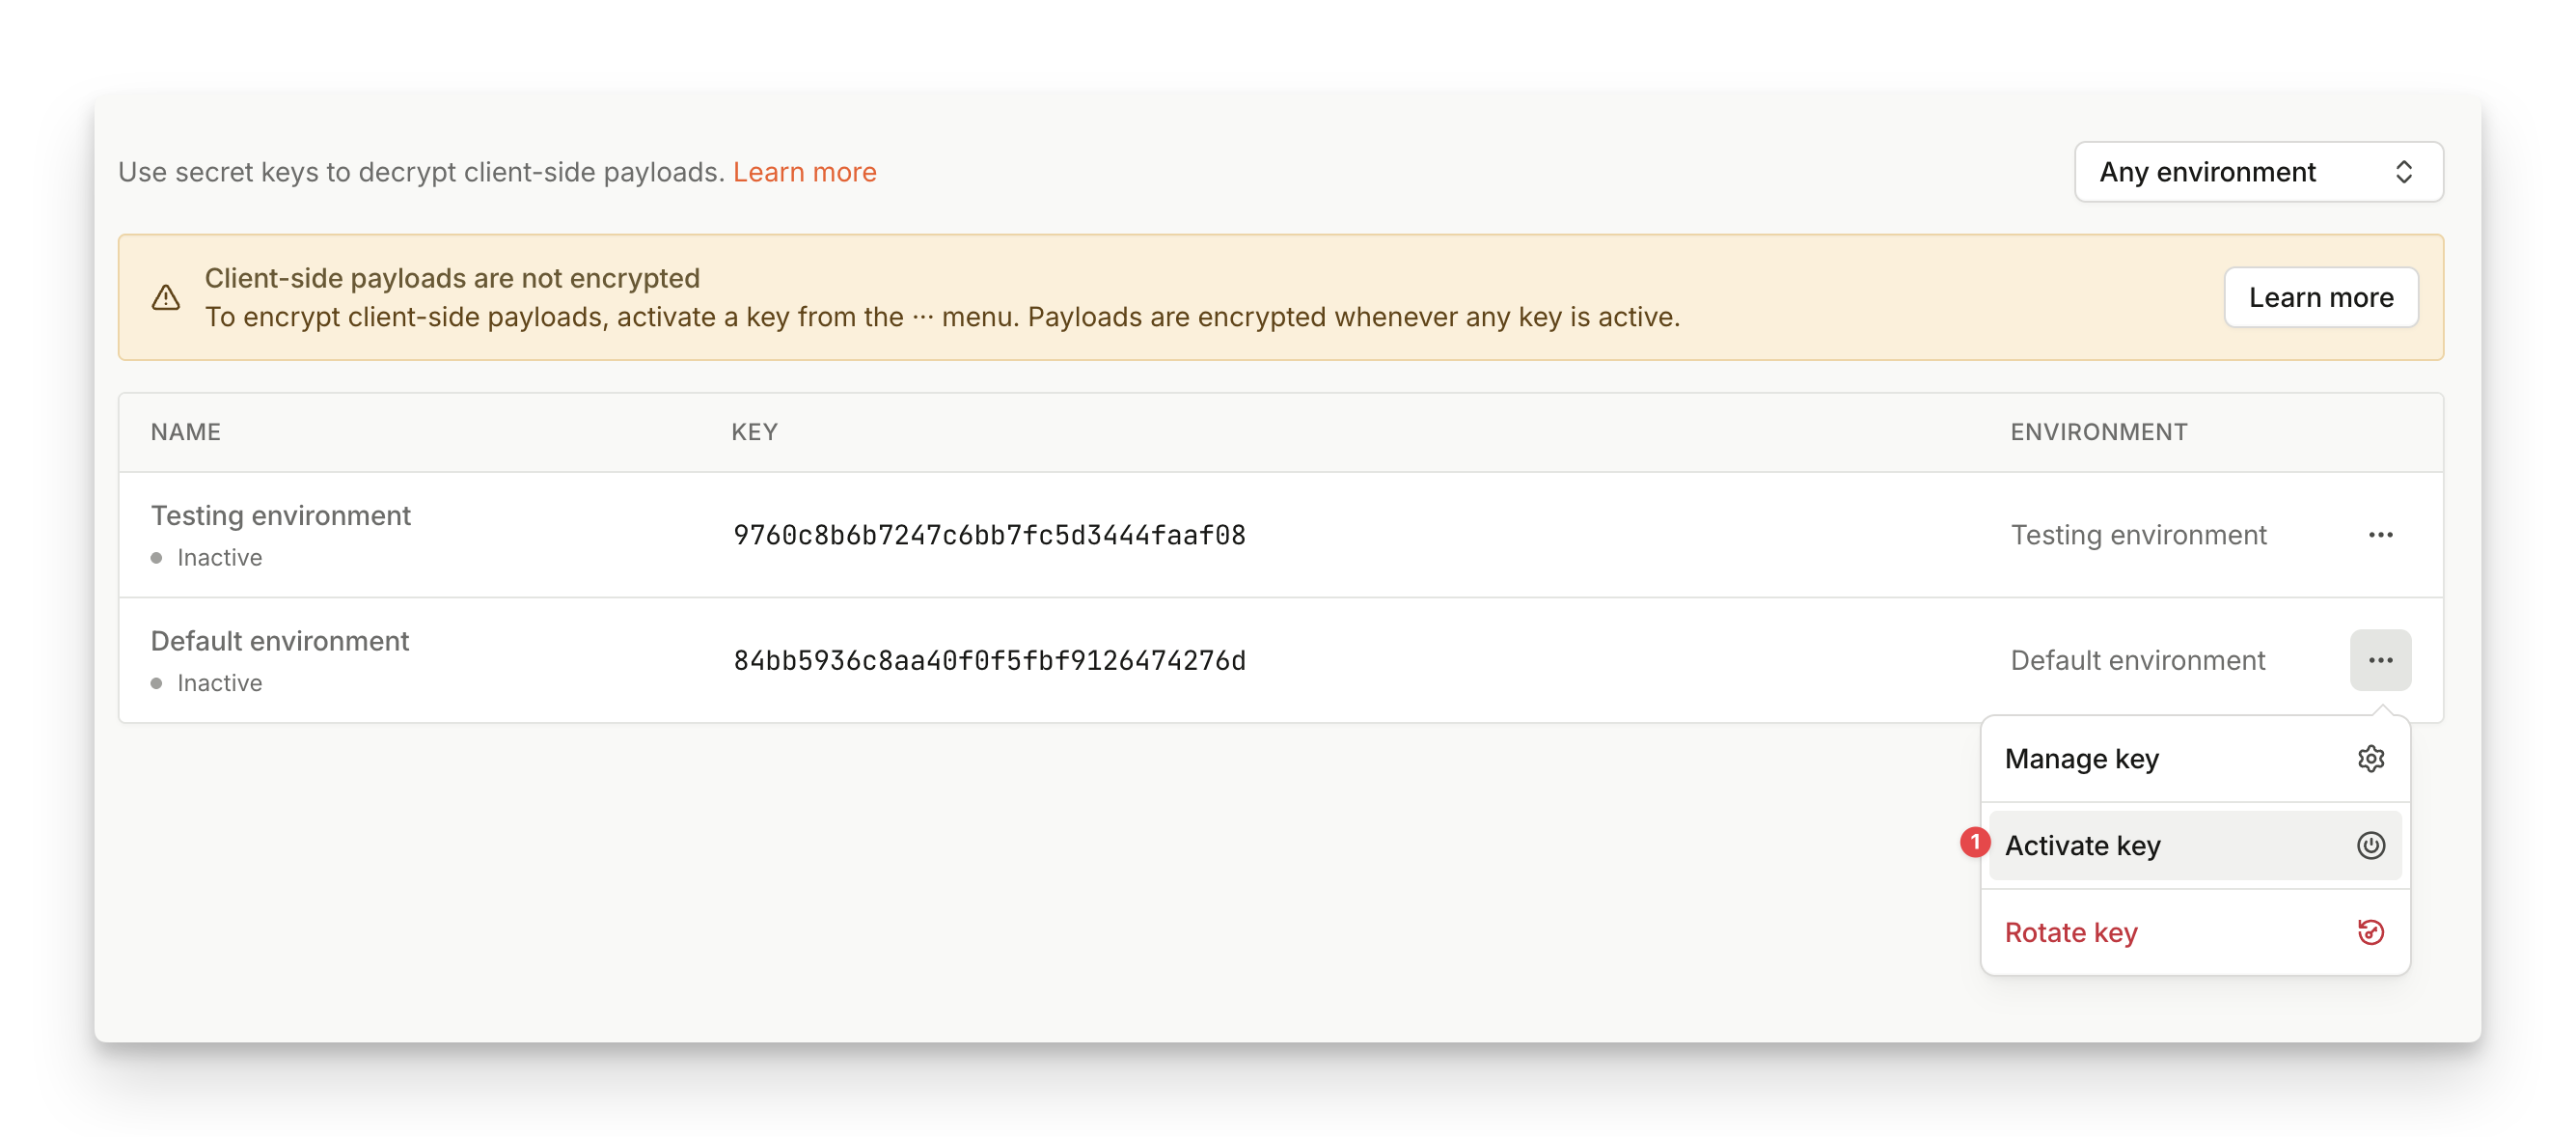
sealed_result payload should start flowing from your client to your backend. Note that the key propagation could take a few minutes to finish so don’t worry if you don’t see the sealed_result payload immediately after the key got activated.
Sealed Client Results with multiple environments
Sealed results are scoped to a specific environment. When creating an environment, an inactive encryption key will be automatically generated. By activating encryption keys, you are selecting on which environment you want payload to be encrypted. If you’re utilizing multiple environments, this means you can partially select for which environment you want to turn on Sealed Client Results. Payloads will only be encrypted on environments with an active encryption key. On other environments, payload will remain unchanged. This is beneficial if you would like to incrementally integrate Sealed Client Results into your multi-environment setup, or if you’d like to test Sealed Client Results on a smaller chunk of traffic before rolling it out everywhere.Key Rotation
We recommend creating a regular process for key rotation to prevent potential misuse. The generated keys don’t expire but it is advised to rotate the key every 3 months, or before reaching a total of 4 billion requests, or if the key might have leaked (whatever comes first). In all cases, follow these steps:- Navigate to Dashboard > API Keys > Sealed Client Results.
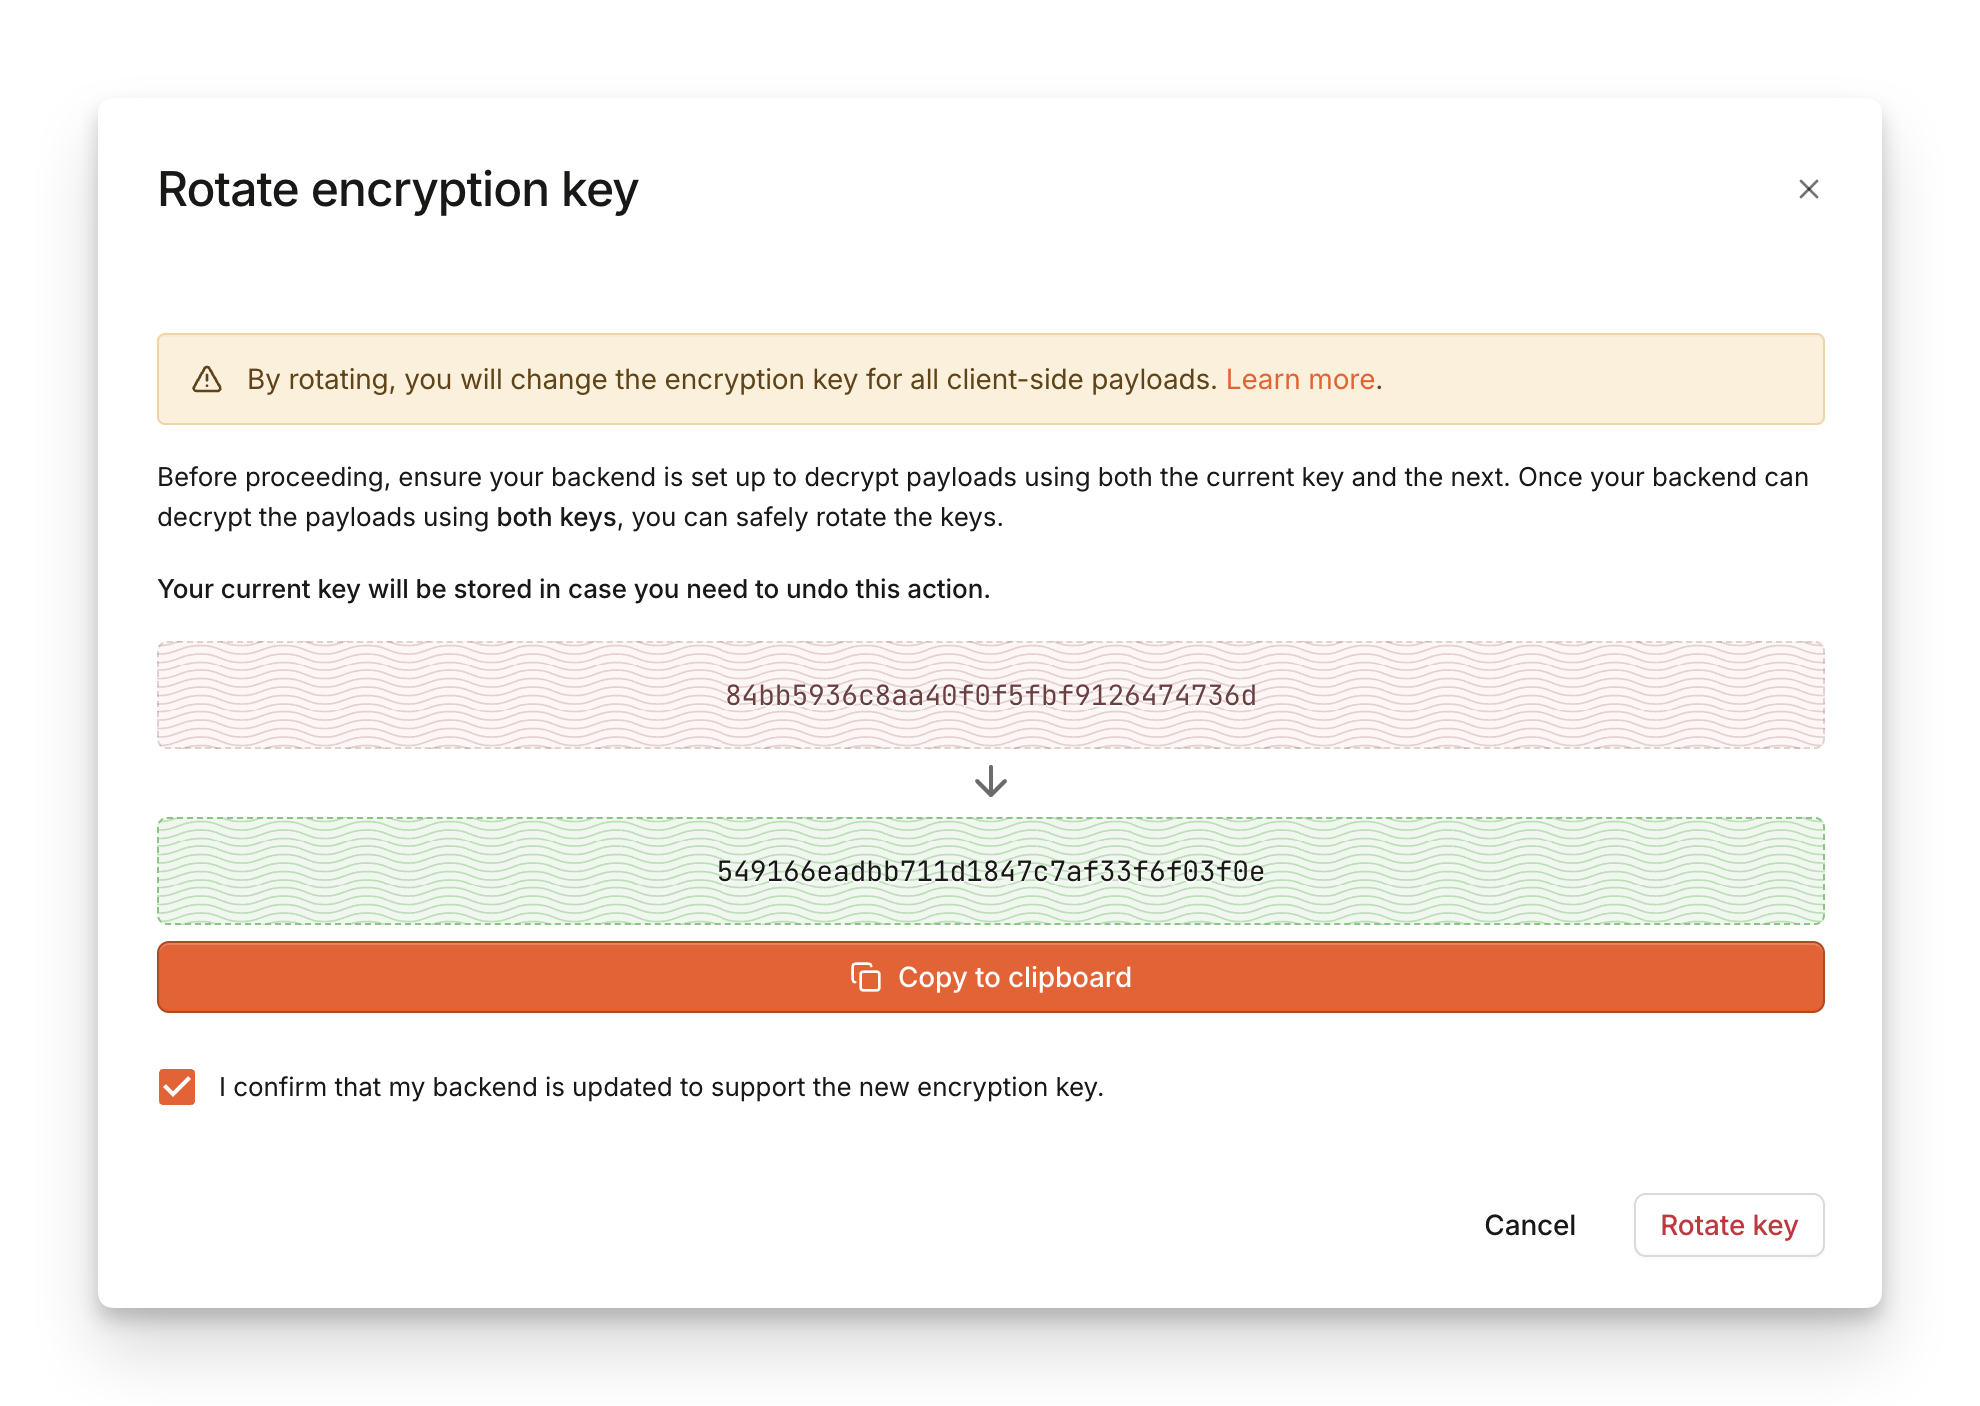
- Find the key you want to rotate, click
...and select Rotate. - In the dialog, you will find the new key that will replace the existing key after the rotation. Save the value of the next key and you can safely close the dialog.
- Update the backend to try unsealing with both the old (original) and the new key.
- Once your backend is ready to work with the new key, return to the dashboard and re-open the rotation dialog from step 2.
- Click on Rotate. The old key is deactivated as there cannot be more than one key active at a time.
- Wait a few moments until your backend starts receiving results sealed with the new key exclusively. Optionally, you can then completely remove the old key from the backend logic.
- Find the key you rotated, click
...and select Revert. - In the dialog, you will find the previous key that you will be reverting to.
- Click on Revert to confirm the action.
Replay attack protection
Sealed Client Results don’t add any protection against possible replay attacks. However, the feature makes it easy to implement replay attack protection. With Sealed Client Results, you only need to check if theevent_id retrieved from the sealed_result contains a unique and previously unseen value. Because the sealed payload cannot be modified, the event_id is always valid and genuine.
Additionally, you can also check the timestamp field to further validate the authenticity of the request. The time difference between timestamp and the current time should not surpass a reasonably low threshold.
Disabling Sealed Client Results
You can turn off Sealed Client Results simply by disabling the Encryption key in the Dashboard. If you’ve disabled the Encryption key by accident, you can re-enable the key to prevent any damage to your integration. Once disabled, keys cannot be deleted for 72 hours from last deactivation. This is to make sure you can still reactivate keys in time if you need to update your integration. If you need any assistance with disabling Sealed Client Results, please contact our support team.Implementation exampleSee our VPN detection use case demo and tutorial for a practical example of Sealed results implementation. The demo is open-source and available on GitHub.
Appendix: Payload format
After serializingsealed_result using base64(), the value is a base64 representation of the following binary structure:

-
[4 Bytes] Version header (currently set to
0x9E85DCED)- You can use the version header to check that you are processing the correct version of the payload but it isn’t part of the encrypted section. In rare cases where we introduce breaking changes to the payload structure, the version header will also get a new value (along with a way to pick which version you want to consume to ensure a smooth transition between different versions).
-
/v4/eventsPayload sealed with AES-256-GCM- [12 Bytes] Nonce/Initialization Vector
- Encrypted
/v4/eventsJSON payload, compressed with raw deflate - [16 Bytes] Authentication Tag