> ## Documentation Index
> Fetch the complete documentation index at: https://docs.fingerprint.com/llms.txt
> Use this file to discover all available pages before exploring further.
# Segment Data Integration
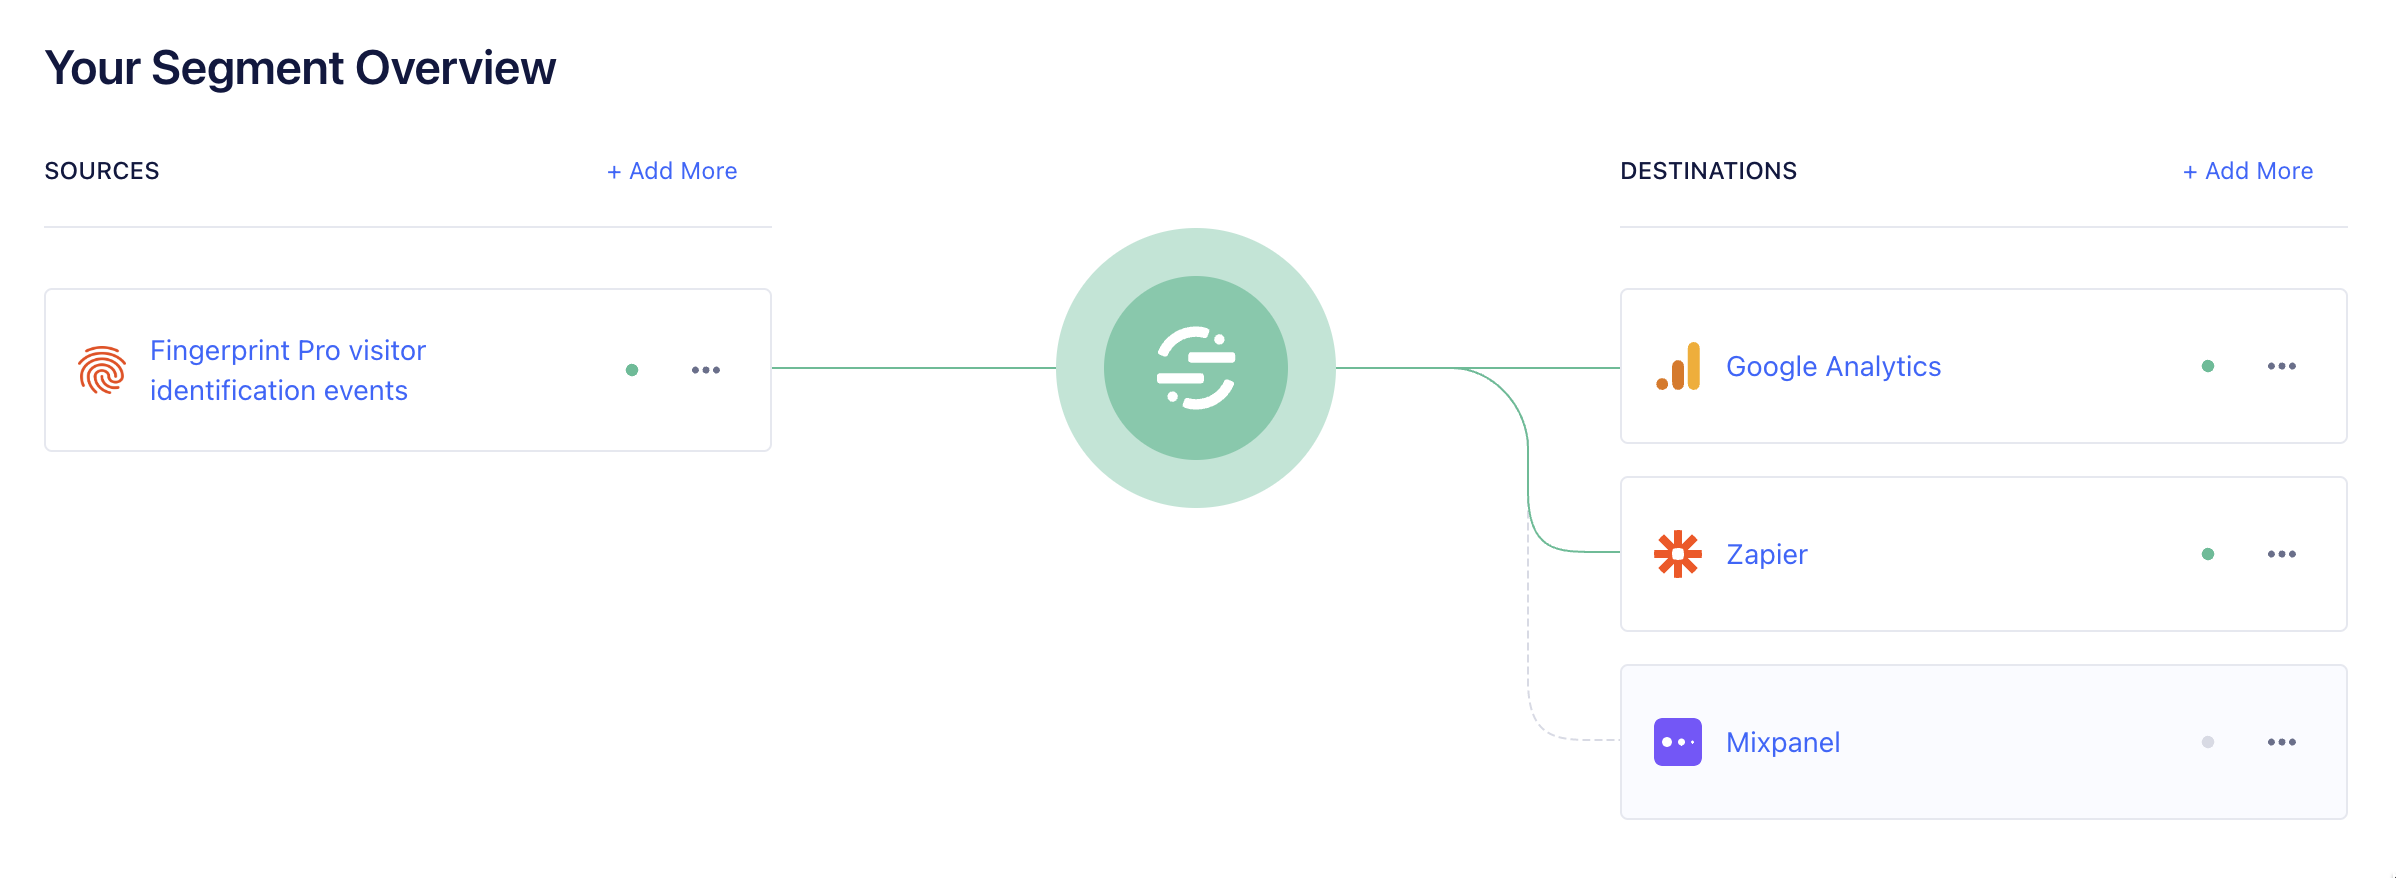
The [Segment data integration](https://github.com/fingerprintjs/fingerprint-pro-segment-source-function) allows you to use Fingerprint visitor identification data as a [data source](https://segment.com/docs/connections/sources/) in Segment. It consists of an open-source [Segment Source Function](https://Segment.com/docs/connections/functions/source-functions/) which receives the data through Fingerprint [webhooks](/docs/v3/webhooks) and normalizes them into [Segment Specs](https://segment.com/docs/connections/spec/).
Once your Fingerprint data is inside Segment, you can use it in any of your Segment destinations to detect suspicious activity, prevent fraud or personalize user experiences.
 **Requirements and limitations**
* You need to have the Fingerprint [JavaScript agent](/reference/v3/javascript-agent) installed on your website and configured to send data to Segment via Fingerprint webhooks. Installing Segment on your website directly is not required.
* Mobile platforms are currently not supported. Reach out to our [support](https://fingerprint.com/support/) if you have any questions.
## How to set up
### 1. Import the Fingerprint Segment Source Function
1. Log in to your Segment account.
2. Navigate to **Connections** > **Catalog** and switch to the **Functions** tab.
3. Click **New Function**.
4. Select **Source**, then click **Build**.
5. Replace the source code with the [latest Fingerprint Segment source function](https://github.com/fingerprintjs/fingerprint-pro-segment-source-function/releases/latest/download/fingerprint-pro-segment-source-function.js).
6. Click **Configure**, and enter a descriptive name, such as `Fingerprint Source Function`.
7. Optionally, you can add a description and logo of your choice.
8. Click **Create Function**.
You have successfully created a Segment Source Function.
### 2. Create a Segment Source connected to the Fingerprint Source function
Continuing from the previous step (or if you have closed the browser tab, go to **Connections** > **Catalog** > **Functions** > **Fingerprint Source Function**)
1. Click **Connect Source**.
2. Add a descriptive name, for example `Fingerprint visitor identification events`. Optionally, you can put labels of your choice.
3. Click **Continue**, then **Continue** again, a finally **Finish**.
You have successfully created a Segment Source. The source overview page will show you the webhook URL. Keep it handy, you will need it in the next step.
### 3. Configure a Fingerprint webhook to send data to Segment
1. Log in to your Fingerprint account.
2. Go to **Webhooks**.
3. Click **Add Webhook**.
4. Paste the webhook URL of your Source. (You can always find it in **Segment** > **Connections** > **Sources** > **Your Fingerprint Source** > **Overview** )
5. Optionally, add a description, for example "Segment source". Do not set any authentication.
6. Click **Save**.
7. Click **Send Test Event** and wait for a confirmation that Segment successfully received the test event data. If you do not see the confirmation, check the webhook URL and try again. Sending the test event can take a minute or two.
You have successfully configured a Fingerprint webhook. For every visitor identification event, Fingerprint will now send the identification result to your Segment Source Function.
### 4. Configure the Fingerprint JavaScript Agent on your website
The Segment integration is *not* enabled by default. Your website must have the Fingerprint JavaScript agent installed and configured explicitly to use the Segment Integration.
1. If you haven't already, [install the Fingerprint JavaScript agent](/reference/v3/javascript-agent) on your website, for example:
```html theme={"theme":"github-dark-dimmed"}
```
2. Insert a `tag.integrations.segment` object into the options of the JavaScript agent's `get` method to enable your Segment integration. The Segment Source function will ignore identification events received from Fingerprint that do not include the `tag.integrations.segment` object. For more info about `tag` see the [JavaScript agent API Reference](/reference/v3/js-agent-get-function#tag).
```javascript theme={"theme":"github-dark-dimmed"}
fpPromise.then(fp =>
fp.get({
tag: {
integrations: {
segment: {
/* segment fields */
},
},
},
})
);
```
3. Inside the `segment` object, define [Segment Specs](https://segment.com/docs/connections/spec/), like below:
```javascript theme={"theme":"github-dark-dimmed"}
const segmentFields = {
skipIntegration: false,
identify: {
// ... identify spec fields
},
page: {
// ... page spec fields
},
track: {
// ... track spec fields
},
group: {
// ... group spec fields
}
}
```
You can use `identify`, `page`, `group`, and `track` for corresponding Specs. You can use any or all specs in a single request, the Identify Spec is sent even when omitted. You can use `skipIntegration` for skipping the segment integration entirely.
See [How to use](#how-to-use) for more details on each spec.
### Receiving and using the data
Now that the JavaScript agent and Segment Source are connected, the Specs should be flowing to your segment account as visitors come your website and are identified by Fingerprint.
You can debug the data coming in by going to **Connections** > **Sources** > **Your Fingerprint Source** > **Debugger**.\
Set up some [destinations](https://segment.com/docs/connections/destinations/catalog/#security-fraud) to use the data, for example, Google Analytics, Castle, Mixpanel, or others that suit your business needs the best.
## How to use
The Fingerprint Segment Source function creates Specs based on the [visitor identification result](/reference/v3/js-agent-get-function#get-response) and the metadata you pass to the `tag.integrations.segment` object.
```javascript theme={"theme":"github-dark-dimmed"}
fp.get({
tag: {
integrations: {
segment: {
skipIntegration: false,
identify: {
userId: 'your_internal_ID_123456',
traits: {
name: 'Jon Doe',
},
},
page: {
category: 'Account',
name: 'Update Password',
properties: {
path: '/account/password',
referrer: '/account/home',
},
context: {
trial: true,
}
},
track: {
event: 'Plan Updated',
properties: {
currency: 'USD',
value: '19.99'
}
},
group: {
groupId: '0e8c78ea9d97a7b8185e8632',
traits: {
name: 'Fingerprint',
industry: 'Tech',
employees: 110,
},
},
}
}
}
// ... more fields
})
```
### Identify Spec
The [Identify Spec](https://segment.com/docs/connections/spec/identify/) lets you record who the visitor is and the traits you know about them. You can use the `segment.identify` field to pass your visitor metadata to Segment. This spec is always created based on the visitor identification result, even when you omit the `identify` field.
```javascript theme={"theme":"github-dark-dimmed"}
const segment = {
identify: {
userId: '123456',
traits: {
name: 'Jon Doe',
},
},
}
```
This is how fields in the Identify Spec are populated:
| Identify Spec field | Source field in Fingerprint `result` or metadata passed to `segment.identify` |
| ------------------- | ----------------------------------------------------------------------------------------------------------------------------------------- |
| `anonymousId` | [`result.visitorId`](/reference/v3/js-agent-get-function#visitorid) - Fingerprint `visitorId` |
| `traits.visitorId` | [`result.visitorId`](/reference/v3/js-agent-get-function#visitorid) - Fingerprint `visitorId` |
| `traits.createdAt` | [`result.firstSeenAt.subscription`](/reference/v3/js-agent-get-function#firstseenat) - time of the first visit recorded in your workspace |
| `userId` | `identify.userId` - your internal user ID |
| `traits` | `identify.traits` - any traits you want to record |
### Page Spec
The [Page Spec](https://segment.com/docs/connections/spec/page/) lets you record whenever a user sees a page of your website, along with any optional properties about the page. It is defined by the `page` field.
```javascript theme={"theme":"github-dark-dimmed"}
const segment = {
page: {
category: 'Account',
name: 'Update Password',
properties: {
path: '/account/password',
referrer: '/account/home',
},
context: {
trial: true,
}
},
}
```
This is how fields in the Page Spec are populated:
| Page Spec field | Source field in Fingerprint `result` or metadata passed to `segment` |
| ------------------------- | --------------------------------------------------------------------------------------------------------- |
| `anonymousId` | [`result.visitorId`](/reference/v3/js-agent-get-function#visitorid) - Fingerprint `visitorId` |
| `userId` | `identify.userId` - your internal user ID |
| `context.ip` | [`result.ip`](/reference/v3/js-agent-get-function#ip) - IP address |
| `context.browserDetails` | [`result.browserDetails`](/reference/v3/js-agent-get-function#browsername) - Browser, OS name and version |
| `context.incognito` | [`result.incognito`](/reference/v3/js-agent-get-function#incognito) - Incognito mode |
| `context.confidenceScore` | [`result.confidenceScore`](/reference/v3/js-agent-get-function#confidence) - Confidence score |
| `context.requestId` | [`result.requestId`](/reference/v3/js-agent-get-function#requestid) - ID of Fingerprint request |
| `properties.url` | [`result.url`](/docs/v3/webhooks#webhook-payload-format) - page URL |
| `context` | `page.context` - any context you want to record |
| `properties` | `page.properties` - any properties you want to record |
### Track Spec
The [Track Spec](https://segment.com/docs/connections/spec/track/) is how you record the actions your users perform, along with any properties that describe the action. It is defined by the `track` field.
```javascript theme={"theme":"github-dark-dimmed"}
const segment = {
track: {
event: 'Plan Updated',
properties: {
currency: 'USD',
value: '19.99'
}
},
}
```
This is how fields in the Track Spec are populated:
| Track Spec field | Source field in Fingerprint `result` or metadata passed to `segment.track` |
| ---------------- | --------------------------------------------------------------------------------------------- |
| `event` | `track.event` - the event you’re tracking, required |
| `properties` | `track.properties` - any properties you want to record |
| `anonymousId` | [`result.visitorId`](/reference/v3/js-agent-get-function#visitorid) - Fingerprint `visitorId` |
| `userId` | `identify.userId` - your internal user ID |
> ⚠️ The `event` field is required to create a Track Spec.
### Group Spec
The [Group Spec](https://segment.com/docs/connections/spec/group/) is how you associate an individual user with a group, for example, a company, organization, account, project, or team. It is defined by the `group` field.
```javascript theme={"theme":"github-dark-dimmed"}
const segment = {
group: {
groupId: '0e8c78ea9d97a7b8185e8632',
traits: {
name: 'Fingerprint',
industry: 'Tech',
employees: 110,
},
},
}
```
This is how fields in the Group Spec are populated:
| Group Spec field | Source field in Fingerprint `result` or metadata passed to `segment` |
| ---------------- | --------------------------------------------------------------------------------------------- |
| `groupId` | `group.groupId` - the group ID you’re tracking, required |
| `traits` | `group.traits` - any group traits you want to record |
| `anonymousId` | [`result.visitorId`](/reference/v3/js-agent-get-function#visitorid) - Fingerprint `visitorId` |
| `userId` | `identify.userId` - your internal user ID |
> ⚠️ The `groupId` field is required to create a Group Spec.
### Screen Spec
[Screen Spec](https://segment.com/docs/connections/spec/screen/) is currently not supported.
### Skipping the integration
Set `skipIntegration` to `true` to prevent the source function from creating any Specs. Defaults to `false`.
**Requirements and limitations**
* You need to have the Fingerprint [JavaScript agent](/reference/v3/javascript-agent) installed on your website and configured to send data to Segment via Fingerprint webhooks. Installing Segment on your website directly is not required.
* Mobile platforms are currently not supported. Reach out to our [support](https://fingerprint.com/support/) if you have any questions.
## How to set up
### 1. Import the Fingerprint Segment Source Function
1. Log in to your Segment account.
2. Navigate to **Connections** > **Catalog** and switch to the **Functions** tab.
3. Click **New Function**.
4. Select **Source**, then click **Build**.
5. Replace the source code with the [latest Fingerprint Segment source function](https://github.com/fingerprintjs/fingerprint-pro-segment-source-function/releases/latest/download/fingerprint-pro-segment-source-function.js).
6. Click **Configure**, and enter a descriptive name, such as `Fingerprint Source Function`.
7. Optionally, you can add a description and logo of your choice.
8. Click **Create Function**.
You have successfully created a Segment Source Function.
### 2. Create a Segment Source connected to the Fingerprint Source function
Continuing from the previous step (or if you have closed the browser tab, go to **Connections** > **Catalog** > **Functions** > **Fingerprint Source Function**)
1. Click **Connect Source**.
2. Add a descriptive name, for example `Fingerprint visitor identification events`. Optionally, you can put labels of your choice.
3. Click **Continue**, then **Continue** again, a finally **Finish**.
You have successfully created a Segment Source. The source overview page will show you the webhook URL. Keep it handy, you will need it in the next step.
### 3. Configure a Fingerprint webhook to send data to Segment
1. Log in to your Fingerprint account.
2. Go to **Webhooks**.
3. Click **Add Webhook**.
4. Paste the webhook URL of your Source. (You can always find it in **Segment** > **Connections** > **Sources** > **Your Fingerprint Source** > **Overview** )
5. Optionally, add a description, for example "Segment source". Do not set any authentication.
6. Click **Save**.
7. Click **Send Test Event** and wait for a confirmation that Segment successfully received the test event data. If you do not see the confirmation, check the webhook URL and try again. Sending the test event can take a minute or two.
You have successfully configured a Fingerprint webhook. For every visitor identification event, Fingerprint will now send the identification result to your Segment Source Function.
### 4. Configure the Fingerprint JavaScript Agent on your website
The Segment integration is *not* enabled by default. Your website must have the Fingerprint JavaScript agent installed and configured explicitly to use the Segment Integration.
1. If you haven't already, [install the Fingerprint JavaScript agent](/reference/v3/javascript-agent) on your website, for example:
```html theme={"theme":"github-dark-dimmed"}
```
2. Insert a `tag.integrations.segment` object into the options of the JavaScript agent's `get` method to enable your Segment integration. The Segment Source function will ignore identification events received from Fingerprint that do not include the `tag.integrations.segment` object. For more info about `tag` see the [JavaScript agent API Reference](/reference/v3/js-agent-get-function#tag).
```javascript theme={"theme":"github-dark-dimmed"}
fpPromise.then(fp =>
fp.get({
tag: {
integrations: {
segment: {
/* segment fields */
},
},
},
})
);
```
3. Inside the `segment` object, define [Segment Specs](https://segment.com/docs/connections/spec/), like below:
```javascript theme={"theme":"github-dark-dimmed"}
const segmentFields = {
skipIntegration: false,
identify: {
// ... identify spec fields
},
page: {
// ... page spec fields
},
track: {
// ... track spec fields
},
group: {
// ... group spec fields
}
}
```
You can use `identify`, `page`, `group`, and `track` for corresponding Specs. You can use any or all specs in a single request, the Identify Spec is sent even when omitted. You can use `skipIntegration` for skipping the segment integration entirely.
See [How to use](#how-to-use) for more details on each spec.
### Receiving and using the data
Now that the JavaScript agent and Segment Source are connected, the Specs should be flowing to your segment account as visitors come your website and are identified by Fingerprint.
You can debug the data coming in by going to **Connections** > **Sources** > **Your Fingerprint Source** > **Debugger**.\
Set up some [destinations](https://segment.com/docs/connections/destinations/catalog/#security-fraud) to use the data, for example, Google Analytics, Castle, Mixpanel, or others that suit your business needs the best.
## How to use
The Fingerprint Segment Source function creates Specs based on the [visitor identification result](/reference/v3/js-agent-get-function#get-response) and the metadata you pass to the `tag.integrations.segment` object.
```javascript theme={"theme":"github-dark-dimmed"}
fp.get({
tag: {
integrations: {
segment: {
skipIntegration: false,
identify: {
userId: 'your_internal_ID_123456',
traits: {
name: 'Jon Doe',
},
},
page: {
category: 'Account',
name: 'Update Password',
properties: {
path: '/account/password',
referrer: '/account/home',
},
context: {
trial: true,
}
},
track: {
event: 'Plan Updated',
properties: {
currency: 'USD',
value: '19.99'
}
},
group: {
groupId: '0e8c78ea9d97a7b8185e8632',
traits: {
name: 'Fingerprint',
industry: 'Tech',
employees: 110,
},
},
}
}
}
// ... more fields
})
```
### Identify Spec
The [Identify Spec](https://segment.com/docs/connections/spec/identify/) lets you record who the visitor is and the traits you know about them. You can use the `segment.identify` field to pass your visitor metadata to Segment. This spec is always created based on the visitor identification result, even when you omit the `identify` field.
```javascript theme={"theme":"github-dark-dimmed"}
const segment = {
identify: {
userId: '123456',
traits: {
name: 'Jon Doe',
},
},
}
```
This is how fields in the Identify Spec are populated:
| Identify Spec field | Source field in Fingerprint `result` or metadata passed to `segment.identify` |
| ------------------- | ----------------------------------------------------------------------------------------------------------------------------------------- |
| `anonymousId` | [`result.visitorId`](/reference/v3/js-agent-get-function#visitorid) - Fingerprint `visitorId` |
| `traits.visitorId` | [`result.visitorId`](/reference/v3/js-agent-get-function#visitorid) - Fingerprint `visitorId` |
| `traits.createdAt` | [`result.firstSeenAt.subscription`](/reference/v3/js-agent-get-function#firstseenat) - time of the first visit recorded in your workspace |
| `userId` | `identify.userId` - your internal user ID |
| `traits` | `identify.traits` - any traits you want to record |
### Page Spec
The [Page Spec](https://segment.com/docs/connections/spec/page/) lets you record whenever a user sees a page of your website, along with any optional properties about the page. It is defined by the `page` field.
```javascript theme={"theme":"github-dark-dimmed"}
const segment = {
page: {
category: 'Account',
name: 'Update Password',
properties: {
path: '/account/password',
referrer: '/account/home',
},
context: {
trial: true,
}
},
}
```
This is how fields in the Page Spec are populated:
| Page Spec field | Source field in Fingerprint `result` or metadata passed to `segment` |
| ------------------------- | --------------------------------------------------------------------------------------------------------- |
| `anonymousId` | [`result.visitorId`](/reference/v3/js-agent-get-function#visitorid) - Fingerprint `visitorId` |
| `userId` | `identify.userId` - your internal user ID |
| `context.ip` | [`result.ip`](/reference/v3/js-agent-get-function#ip) - IP address |
| `context.browserDetails` | [`result.browserDetails`](/reference/v3/js-agent-get-function#browsername) - Browser, OS name and version |
| `context.incognito` | [`result.incognito`](/reference/v3/js-agent-get-function#incognito) - Incognito mode |
| `context.confidenceScore` | [`result.confidenceScore`](/reference/v3/js-agent-get-function#confidence) - Confidence score |
| `context.requestId` | [`result.requestId`](/reference/v3/js-agent-get-function#requestid) - ID of Fingerprint request |
| `properties.url` | [`result.url`](/docs/v3/webhooks#webhook-payload-format) - page URL |
| `context` | `page.context` - any context you want to record |
| `properties` | `page.properties` - any properties you want to record |
### Track Spec
The [Track Spec](https://segment.com/docs/connections/spec/track/) is how you record the actions your users perform, along with any properties that describe the action. It is defined by the `track` field.
```javascript theme={"theme":"github-dark-dimmed"}
const segment = {
track: {
event: 'Plan Updated',
properties: {
currency: 'USD',
value: '19.99'
}
},
}
```
This is how fields in the Track Spec are populated:
| Track Spec field | Source field in Fingerprint `result` or metadata passed to `segment.track` |
| ---------------- | --------------------------------------------------------------------------------------------- |
| `event` | `track.event` - the event you’re tracking, required |
| `properties` | `track.properties` - any properties you want to record |
| `anonymousId` | [`result.visitorId`](/reference/v3/js-agent-get-function#visitorid) - Fingerprint `visitorId` |
| `userId` | `identify.userId` - your internal user ID |
> ⚠️ The `event` field is required to create a Track Spec.
### Group Spec
The [Group Spec](https://segment.com/docs/connections/spec/group/) is how you associate an individual user with a group, for example, a company, organization, account, project, or team. It is defined by the `group` field.
```javascript theme={"theme":"github-dark-dimmed"}
const segment = {
group: {
groupId: '0e8c78ea9d97a7b8185e8632',
traits: {
name: 'Fingerprint',
industry: 'Tech',
employees: 110,
},
},
}
```
This is how fields in the Group Spec are populated:
| Group Spec field | Source field in Fingerprint `result` or metadata passed to `segment` |
| ---------------- | --------------------------------------------------------------------------------------------- |
| `groupId` | `group.groupId` - the group ID you’re tracking, required |
| `traits` | `group.traits` - any group traits you want to record |
| `anonymousId` | [`result.visitorId`](/reference/v3/js-agent-get-function#visitorid) - Fingerprint `visitorId` |
| `userId` | `identify.userId` - your internal user ID |
> ⚠️ The `groupId` field is required to create a Group Spec.
### Screen Spec
[Screen Spec](https://segment.com/docs/connections/spec/screen/) is currently not supported.
### Skipping the integration
Set `skipIntegration` to `true` to prevent the source function from creating any Specs. Defaults to `false`.